Lesson 5: Facing Ratio Pass!
So the idea for this section came about after seeing a presentation by one of my classmates on how some of the effects for District 9 was achieved. The facing ratio was used in post to further customize level of reflection and specular. Turns out this is quite a popular composting technique. So i’m looking through the Material Palette and I don’t see a default shader to calculate the facing ratio. So we’ll create our own here.
Basically, we would need to shade our model based on the angle between the incidence ray and the surface normal. We want the center of the model to be dark, and the edges to be brighter (the inverse of what usually happens when a model is shaded). To find the angle between the incidence ray and the surface normal we would have to start by finding the dot product of those angles.
Note: For those who are interested in the math behind facing ratio, visit Malcolm Kesson’s page here.
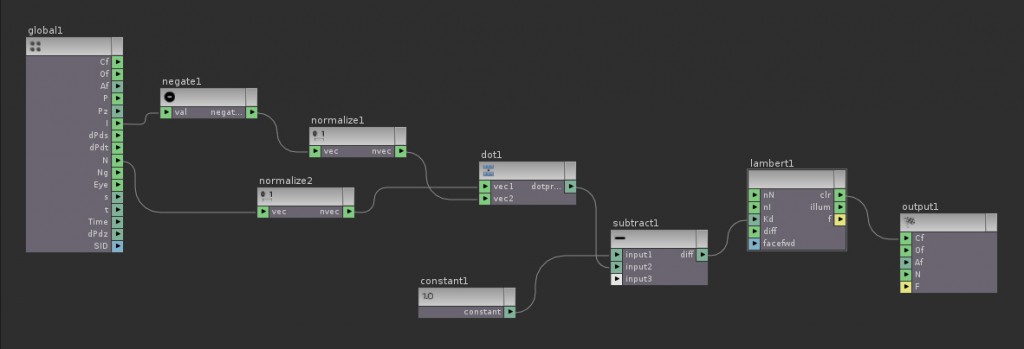
Hit TAB in SHOP context to bring in a new Material node. Enter the material and bring in a VOP VEX Surface SHOP. Connect it to the suboutput node. Enter the VOP VEX Surface SHOP to begin writing this shader. To get the facing ratio shader working at a most basic level, begin by dropping down a negate node. Connect the I of the global variables (Incidence ray) to the negate. The negate effectively multiplies it’s input by -1. Normalize the result by connecting the negate to a normalize node. To be on the safe side, create a new normalize node for the N gobal variable also. Next, hit TAB and drop in a Dot Product node. Connect the normalized I variable to vec2 of the Dot Product node and the normalized N variable to vec1. Create a new Constant node and set it’s 1 Float Default value to 1. Create a Subtract node and connect the constant to input1 of the subtract. Connect the Dot Product output to subtract’s input2 connection. Pipe the output of the subtract into the Kd input of a new Lambert node. Connect the clr output of the Lambert node to the Cf output. The building blocks for the facing ratio shader is finally complete. Here is the network:
The next step would be to add artistic controls for direct access to facing ratio intensity, the Rim Width, Roll Off and Color.
Let’s add parameters for the Color. Really, all you need is to middle-click on the diff input of the Lambert and drop in a parameter node. Next, for the intensity, drop in a multiply node and a new Parameter node with Parameter Type set to float (1 Float Default set to 1). Connect the output of subtract1 to input1 of multiply, and connect parameter1 to input2. Connect the result of the multiply to Kd input of the Lambert instead. To vary the intensity of the Facing Ratio, change the value of the 1 Float Default in the parameter node.
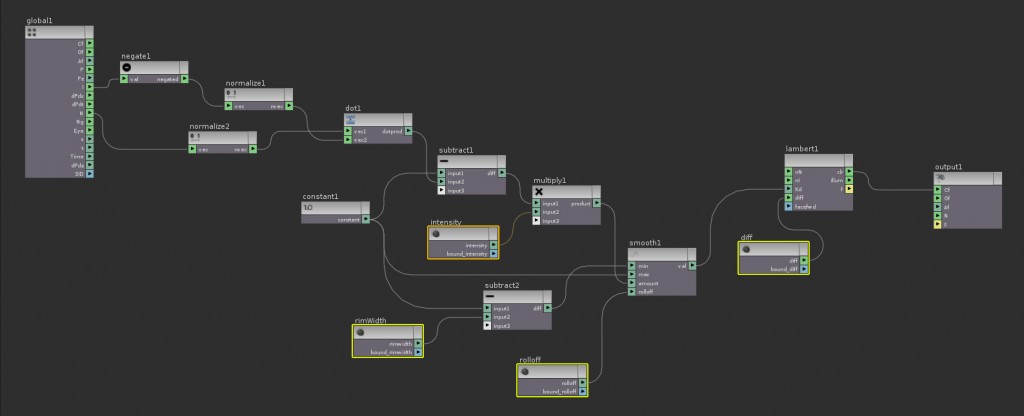
To add control over the rim width and roll off, we will use a Smooth VEX node. Currently, the output of our multiply1 is connected to the Kd of the Lambert. Let the val output of the smooth node connect to the Kd output instead. Connect the output of the multiply1 to the amount input of the smooth. Connect our constant1 node directly into the max parameter of the smooth. Bring in a new subtract node, as well as Drop in a new parameter node to control the Rim Width. Rename this parameter node to rimWidth. Connect constant1 to input1 of the subtract and rimWidth parameter to input2 of the subtract. Connect the result to the min parameter of the smooth. Finally, middle-click the rolloff input of the smooth and choose create parameter node.
So far, using parameter nodes, you should have added 4 controls for the artist to manipulate this shader: Diffuse Color, Intensity, Rim Width, and Rolloff. Hit U on the keyboard twice to go back up to SHOP context, right-click and choose Promote Material Parameters. Here is the completed network along with my parameters highlighted:
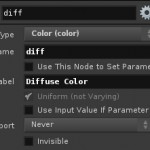
Note: When you are naming parameters, remember that the Parameter Label is what the artist is going to see in the interface, while Parameter Name is only used as an internal reference by Houdini for expression work and channel referencing. The Parameter Name MUST be a unique name with no spaces, and cannot be shared between two parameter nodes!
Image on the left shows my naming convention for the diffuse parameter node, and image on the right shows how this parameter is referenced on the VOP VEX Surface SHOP.
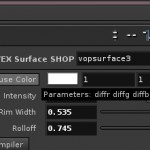
With your 4 parameters successfully promoted up to the SHOP level, you should get a similar looking interface with convenient controls:
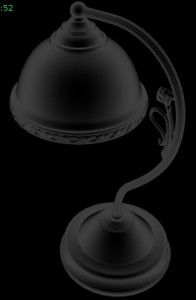
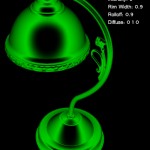
Here are some render tests:
