Lesson 8: _ Passes with 1 Shader!
So In this lesson, we will attempt to create the ultimate shader. A shader that exports up to 14 different channels in one render. To do this I will combine all of the previous lessons and shaders into this lesson.
First, we are going to use one of the default Houdini shaders to explore Mantra’s innate ability to extract passes straight from the shader. From the Material Palette, drop in a Reflective material and apply it to your model.
Set the Lambert Intensity to 0.5 or 50% reflective. Check Use Base Color and set the base color to a color of your choice. Make sure Use Base Color and Use Point Color remains unchecked. In the Color Map tab, make sure Use Color Map is checked instead. Specify a color map to use. Go to the Specular tab and set Specular Intensity to 0.7 or something like that. Make sure the Use Specular Map check box is ticked and specify a Specular Map. Go to the Reflections tab and set Reflection Intensity to be 0.7. In the Ray Trace tab make sure Use Ray Tracing is ticked so you get self reflections. Lets go for some blurry reflections. Set the Cone Angle to be 5 and carry the Area Samples to 8. Now go to the Environment Map tab and specify an environment map to use for the reflections. Make sure the Env Map Space is set to Transform to world space. That’s all the adjustments on this shader for now. I just made up these values but it dosen’t matter. This is my render so far:
The only extra thing that I did was added a simple Spot Light and enabled Raytraced Shadows.
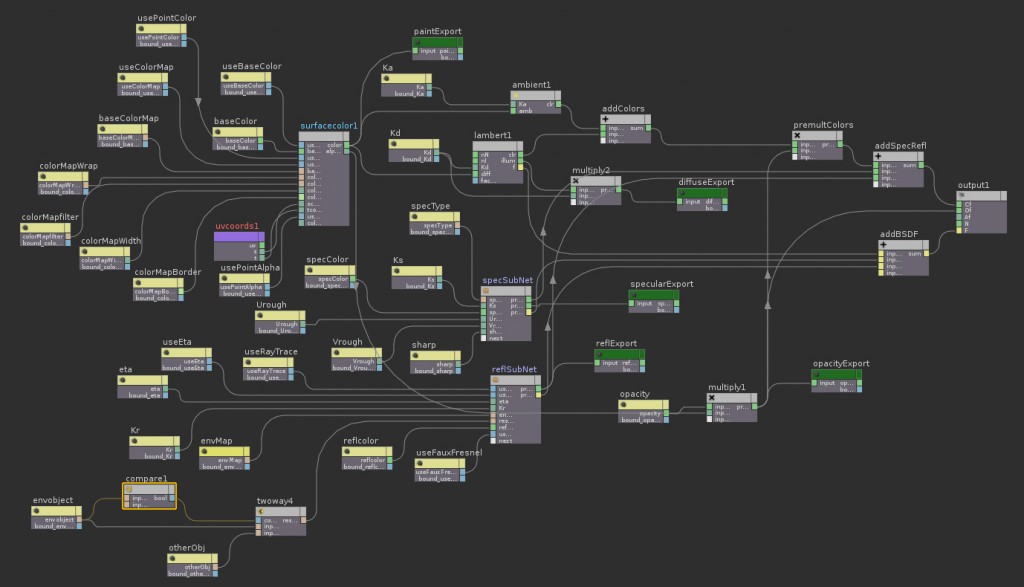
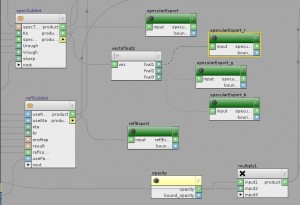
There are already a few passes that we can extract from this render. Let’s explore these first. Go into the SHOP context and double-click to enter this shader. You should see a network that looks identical to this if you used the shader from the shelf (and if you are using Houdini 10):
Don’t get intimidated. If you’ve followed through the lessons, you have already used 90% of the techniques used here. The cream colored nodes are all parameter nodes while the green colored nodes are components of the shaders that can be exported as separated image planes or passes by the renderer. These are the parameters that we are interested in. They are paintExport, diffuseExport, specularExport, reflExport and opacityExport.
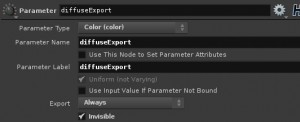
Let’s explore these. First, click on diffuseExport to check out it’s parameters. They sort of look like this:
An important thing to note is the parameter called Export. It’s set to Always, meaning that the values from this node can be exported and used in Houdini in many different contexts. For what we are doing this is important, since it means that the Mantra renderer can pick up on this value also. The other parameter is the Invisible checkbox. This simply means that this parameter won’t be visible to the artist. The artist does not need to see this parameter along with the other sliders in the shader’s interface. When we are creating our custom exports, we will use similar settings. For now, just note the Parameter Name for this node. In this case it’s diffuseExport and we will have to refer to it in Mantra as exactly that. So let’s create a new Mantra node in the OUT context (if you haven’t already) and see if we can render out these in separate passes.
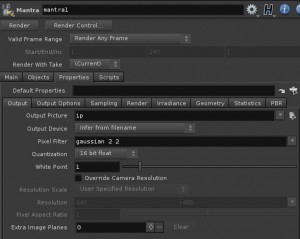
Go to the Properties tab, then the Output tab. These should be your initial settings:
Create a new image plane by hitting the plus icon beside the Extra Image Planes option. In the VEX Variable box type diffuseExport. In the Channel Name 1 box, give it a name of your choice (No spaces!). Now render this mantra. You should now have an extra image plane, similar to below:
Take a look at this image plane. It’s the diffuse lighting information. Let’s export the rest in the same fashion. paintExport, reflExport specularExport and opacityExport. Create a new image plane for each by hitting the plus icon and entering in these as the VEX Variable. Hit render. Along with the regular Color render pass, you should now have 5 more passes that you can choose from the mantra window. These are the passes:
This is all from one shader applied to the same model. Now, we will integrate all of our prior shader passes and more.
Let’s continue with our diffuse and specular passes:
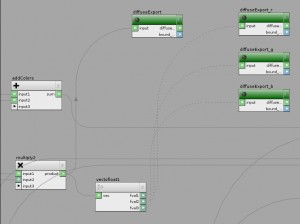
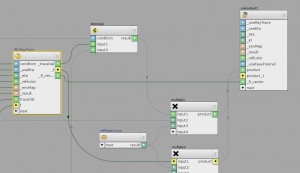
Start by setting up your rgb lighting configuration. Go back into the reflective shader’s VEX network where the green colored diffuseExport parameter node is. Right now it’s receiving it’s imput from a multiply node.
Drop in a Vector To Float node and connect it to the output of that same multiply. This will split the vector output of this multiply into 3 separate rgb float values. Now copy the diffuseExport parameter node and paste it in the network 3 times. Change the Parameter Name of each of these new nodes to something unique, like diffuseExport_r, diffuseExport_g, diffuseExport_b. Connect each to a corresponding fval output of the Vector To Float node. For extracting the diffuse colors here are the changes to the network:
Now we will do the same thing for the specular. The specular is receiving it’s input from the specSubNet product 1 output. Connect new a Vector To Float node to this same output and copy the green specularExport node 3 times. Be sure to rename the Parameter Name for each new parameter node to specularExport_r, specularExport_g, specularExport_b respectively. Here are the changes to this part of the network:
Now it’s time to create 6 new image planes for these new exports that we created. We will do that in Mantra using the same meathod we used above. The VEX Variable in each image plan should be the same as the Parameter Name for each of these export nodes. Render and you should have 6 new passes. I find it interesting that you can extract the passes this easily using the shader in Houdini instead of the shuffleCopy or shuffle nodes in Nuke.
Next is the self reflection matte.
Note: In this pass, you may experience artifacts in your self-reflect matte if you are using blurred reflections. The only way to fix this would be to match the Cone Angle to Sample and Area Samples parameter on our new raytrace node with the values we used on the shader to blur the reflections. This would work, except additional sampling on both the embedded Trace node AND the raytrace node will shoot your render times to the roof. For a slightly alternative meathod go to Meathod 2.
Method 1: Using the Embedded Fresnel VEX VOP
Here, we are going to copy the network we created earlier for the self reflections. If you remember, all we needed for the self-reflections was a raytrace node connected to the fresnel’s R output. To find the fresnel’s output in the reflective shader will take some careful looking. In the shader’s VEX network look for the reflSubNet. Enter that and now look for the ifDoRayTrace node. The fresnel node is located in the if_UseEta node, but you do not have to directly enter it. The output that we need is the _R_vector output of the if_UseEta node:
In this part of the network, connect the _R_vector output to the nearby suboutput node’s next input. Go up one level, back to the ifDoRayTrace node, and that output will now be available. Connect it to the nearby suboutput node in this part of the network:
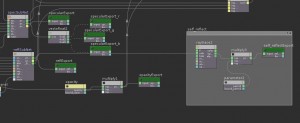
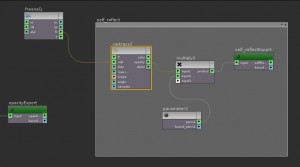
Go up one level once again. The _R_Vector output should now be available on the reflSubNet node. Here is where we will extend the network to include the self-reflection pass. Here is the extended network to include a self_reflect pass:
Here, the _R_Vector output of the reflSubNet node is connected to our raytrace node. A new parameter node is created and colored Green. As the Parameter Name I call it selfReflectExport , which is what I will refer to in Mantra.
Method 2: Using a new Fresnel VEX VOP – Blurring the Matte in Post
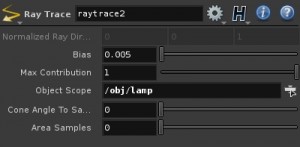
If you need blurry reflections, here is a faster way to do it. Instead of using the embedded fresnel’s _R_Vector output, we will create our own. Also, make sure our Cone Angle To Sample and Area Samples are set to 0. This will effectively give us a sharp self-reflection matte. Here is the network:
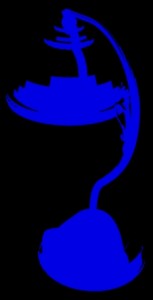
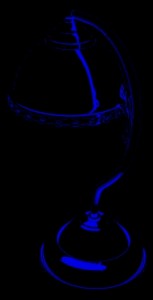
Here are some render results:
On the left the blocky edges are caused by the fact that the area sample settings on my raytrace node do not match the settings used by the shader. Trying to fix this using the meathod I mentioned in my note above will be very expensive. The result on the right uses a new fresnel node instead of the embedded one, as well as using 0 sample settings on my raytrace node:
You can blur this result in post and use it more effectively that way as a matte for blurry self-reflections.

