Lesson 2: Various Surface Matte Shaders in Houdini
There are a few variations of the Matte Shader in Houdini. The first and easiest one to find is the Constant shader in the Material Palette. It is under the General Tab. It’s parameters are pretty straight forward. Notable parameters are:
- Tint with Point Color parameter will actually multiply your constant color with whatever color value your surface points contain. In houdini, you can also store color values in points, and so this checkbox will only affect your shading if there’s color values on your points.
- Color Map is essentially useful to render your texture information with zero lighting information. It will take into consideration already existing UVs and map your texture accordingly. The values of the color map is then multiplied (tinted) with the “Color” value. This parameter is useful to produce your Ambient or Dirt pass.
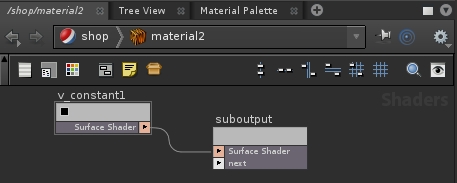
The second shader is the VEX Constant. Go into the SHOP context and lay down a Material node. Next, hit TAB and bring in a VEX Constant node. Connect it to the suboutput node.
The shader contains 3 parameters: Color, Opacity and Alpha. It’s pretty simple and will fulfill most of your lighting/compositing needs.
Promoting shader parameters to the Material
Currently, to get access to the 3 parameters in the VEX constant node, the artist has to go into the Material and directly edit the VEX Constant node. To make these parameters more readily available, press “U” to go back up to SHOP context, rigth-click on the material node and hit Promote Material Parameters.

