Lesson 3: Diffuse & Specular Lighting
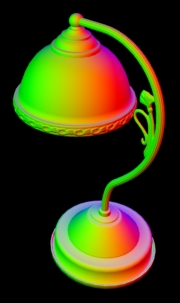
In professor Bridget Gaynor’s lighting/compositing classes, she presents a workflow called the RBG Diffuse Lighting pass. It is basically constructed using three lights of pure red, blue and green. A blinn shader with zero specularity is applied to the object and the scene is rendered. A compositor can then extract each color channel separately for manipulation. In Houdini, the same pass can be executed in a similar manner.
While holding down the CTRL key, drop a SpotLight into the scene. You will then automatically be looking through the light. If not, change your camera from no cam (or your custom camera), to Look Through Light in the drop down menu.
Before you can move the camera while looking through it, you have to enable the Lock camera/light to view button in the options box. When you are finished moving around your light, remember to disable this option.
Create 3 lights that are pure red, green and blue. Position them appropriately for proper light distribution. The default shader that will work best for this type of pass is the Basic Surface shader in the Material Palette, under the General shaders. In this material, reduce the Specular Intensity to zero and leave the other settings intact. Applying this material to your model and rendering should give you this basic pass.
With this pass, you can extract the Red, Green or Blue channels separately in Nuke and manipulate them to suit your lighting needs.
Custom Diffuse Shader
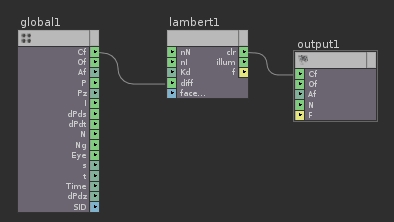
Go to the SHOP context and drop a new Material node using the TAB menu. Enter it and drop a VOP VEX Surface node, connecting it to the suboutput ndoe. Enter the VOP VEX Surface node, hit TAB and drop down a lambert node. From the Global Variables, connect the Cf to the diff of the lambert. Connect the clr output of the lambert to the Cf input of the Output Variables node. Here is the network model for the most basic diffuse lighting shader:
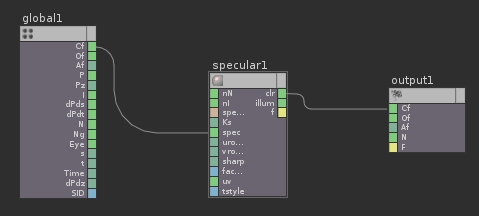
There is really just one parameter on the Lambertian model that the artist needs access to on the Shader level: Diffuse Intensity. If you middle-click on the dark green Kd box and select Create Parameter node, one will automatically be created and be connected to the lambert. You can now just go back to the SHOP level, right click on the material, and choose Promote Material Parameters. Constructing a custom specular shader is very similar. If you are using houdini’s default basic surface, you can reduce the Lambert Intensity and Ambient Intensity to zero while increasing the Specular Intensity to 1. Alternatively, you can go into your custom lambert shader and replace the lambert node with a Specular VEX node:
Important parameters of this node that needs to be directly accessible to the artist include Specular Intensity (Ks), U Roughness (urough), and Specular Type (specType).
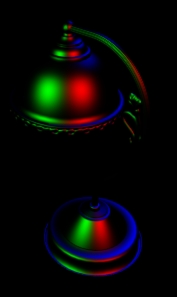
Here is the specular pass:


