Lesson 6: Occlusion Pass
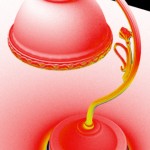
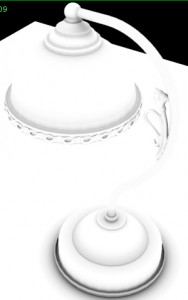
There are many ways to do occlusion in Houdini, the most obvious being the Occlusion shader that’s in the Material palette under the General tab. Apply this shader to your models and you get a pretty basic occlusion pass. Some of the more interesting functionality of this shader are the Mask for Compositing option, as well as color mapping through a Color Ramp. Mask for Compositing gets rid of all the color and inverts the occlusion, effectively creating a mask that you can use in post to add subtle colors to your occlusion. As for the Color Ramp… well:
The Maximum Ray Distance value is -1 by default, meaning that each ray will travel off to infinity.
Rendering Occlusion Separately
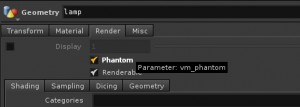
This is essential for a successful render-pass work-flow. It’s pretty simple actually. On the geometry node for the model you want to hide but still contribute occlusion, there is an option called Phantom. It is located on the Render tab of the geometry node:
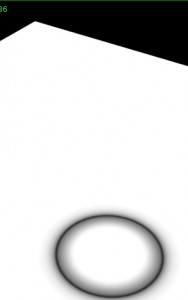
Try this in combination with the Mask for Compositing option in the shader. This technique can of course be extended to shadows and reflections also. But more on that later.
Go over to the Environment Map tab in the occlusion shader and bring in your environment map or HDRI if you’re using one. This will give you directional shadows that somewhat conform to the lighting in the map.
Displacement Occlusion
There is an Occlusion Shader in the Material Palette called Occlusion Displacement. In addition to familiar occlusion parameters, this shader conveniently includes the functionality to specify a Displacement Map. The parameters on the shader is pretty straight forward, but the one thing I do want to point out is in the Properties tab:
True Displacements in Houdini always deforms the points of the surface at render time and not just the normals. With this turned off, note that all you will be receiving is a Bump Map.
Other Methods
The other method I can think about for occlusion in Houdini is a light-based techniques. With this technique however, you sacrifice the level of control you had when using the first method:
Light Template Technique
Go into the SHOP context and hit TAB to bring in a new Material node. Enter it and drop in a VEX Global Illumination node. Connect it to the suboutput. Go back up to SHOP context, right click on the Material node, and choose Promote Material Parameters. This will bring up all the parameters of the VEX Global Illumination node. The most important thing is that the Irradiance Style is set to Ambient Occlusion. Here, the Maximum Intersect Distance parameter is equivalent to the Maximum Ray Distance in our prior occlusion shader.
You have just created a light shader that can be used to evoke simple irradiance functions. To use this shader, go back to OBJ context and drop in a Light Template. In this Light Template, Go to the Render tab, then to the Shaders tab. In the Light Shader box, browse for the light shader material you just created.
