Lesson 1: Introduction to Shaders in Houdini
In Autodesk maya, you interact with shaders at a very high level. The inner workings of the shader is usually not directly accessible to the artist. Instead, you are given access to an organized variety of sliders that the artist would tweak to achieve specific looks. This is quite the opposite with Houdini. While working in Houdini, you will most likely need to understand the mechanics of the shader to get the most out of your workflow. You have to get used to working at a very low level. In programming, this is the difference between working with Python (high level language) as opposed to C (low level language, closer to computer language). In Houdini you still get access to artist-friendly sliders, but your level of control is increased because you have access to more information. For those of you familiar with the RenderMan spec, you will find that constructing Houdini Surface Operators is very similar to working in Pixar’s Slim. Additionally Houdini’s Vector Expression Language is very similar to the RenderMan Shading Language.
Take for example the basic Surface Shader in Maya. You have access to the Out Color, Out Transparency, Out Glow Color and Out Matte Opacity. This shader is useful for creating geometry mattes. In maya, it is impossible to go inside of this shader and take a look at the logic behind it. They were probably compiled in C++ and made available in maya. In Houdini, you can work at a lower level. The corresponding matte shader in this case is the Constant, found in the Material Palette along with other general shaders. 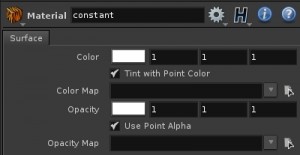
This constant shader is very similar in functionality as well as in parameters. Additionally, you can propagate point color/alpha attributes to the surface. You actually do not have to use one flat color. But supposed you are the curious type who wants to know how this surface shader works under the hood? In Houdini you can do this in the SHOP (SHader OPerators) Network context.
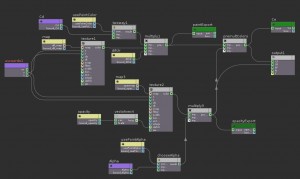
In the SHOP Network context you will see the Material node, representing your constant shader, along with it’s parameters. Going INSIDE of the Material node you will see a constant_shader node, which is a VOP (Vector Operator) VEX (VEctor EXpression Language) surface operator with it’s result being piped into a suboutput1 node.
INSIDE the constant_shader node is where you will find the true logic of the constant surface shader. Each VEX node represents a block of code or function wrapped in a graphical container. Like SLIM, it’s whole purpose is to create a more intuitive workflow for visual artists.
Truely, that’s a good amount of nodes for the simplest shader you can possibly find. The benefit to building your own is that you can have a lighter more efficient shader that does exactly what you need it to do. Building our own can also help us understand exactly what the surface shader is doing.
Similar to the Maya surface shader, the parameters you need for a good matte shader are; Out Color, Out Transparency and Out Matte Opacity. To start from scratch, go back to the SHOP context and by hitting TAB, lay down a new Material. Go inside and you will be greeted with a lonely lame-looking suboutput node. Through the tab context, lay down a VOP VEX SURFACE SHOP.
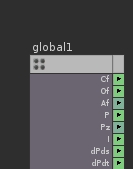
Connect it to the suboutput and enter the vop surface node. In the vop surface node you will find the two nodes that will act as initial building blocks for any shader you will be building in Houdini: The Global Variables node and Output Variables node.
The Global Variables node imports attributes directly from connected geometry. It imports Cf (Surface Color), Of (Surface Opacity), Af (Surface Alpha, P (Surface Position) etc.
So let us begin constructing a surface shader.
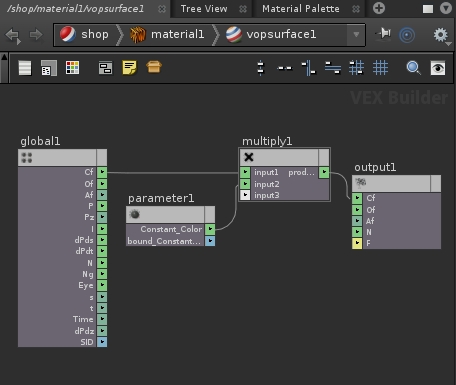
Hit TAB and drop a multiply node beside the Global Variables node. Also drop in a parameter node.
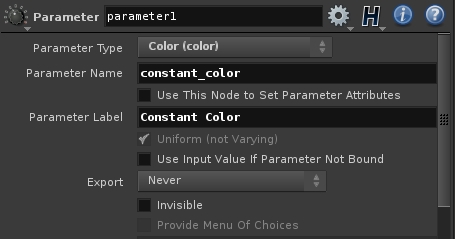
In the parameter VOP node, change the Parameter Type to “Color” and also change the Parameter Name to “constant_color”. You can also set the Parameter Label to an artist-friendly name like “Constant Color”. The Parameter Name is what Houdini will refer to this variable as internally. It cannot contain any spaces. The Parameter Label is what the artist will see in the interface.
Now you will simply connect the Cf (surface color variable) to the first imput of the multiply node, the color parameter to the second input, and connect the mulitiply to the Cf varable of the output node.
You have now effectively multiplied your surface color values by a constant color. Hit “U” on the keyboard to go up one level, where you have your VOP VEX SURFACE SHOP.
You should now see the “Constant Color” label in the interface of the Vop Vex surface node. By default, it may be set to black. Change it to any color you’d like. Press “U” on to go up to the material level:
Drag/Drop your material to your model and do a quick render. You should now have a Constant Shader at it’s most basic level.
The same way you multliply the Cf variable by a color parameter, you could also multiply Of (Surface Opacity), and Af (Surface Alpha) by color and float parameters to add even more controls to your surface shader. Hopefully, this small exercise gave you an idea of how houdini shaders are constructed. We will be constructing more useful shaders in this tutorial, so understanding Houdini’s Shader context is essential.
Note: Color Parameters can also be plugged directly into the Cf parameter of the output node as opposed to multiplying. Multiplying may only be necessary if prior manipulation had been done in the shader network.

